Monday, November 29, 2010

The trees of Christmas and a dilemma . . .

The following are pictures from our whimsical tree at the rear of the shop.  It has many of the same ornaments as half of the tree in the front window—actually, most of them.

But it’s the first tree in about 25 years that has me thinking “multi-colored lights!  Take a look:

mostly christmas 2010 020mostly christmas 2010 021mostly christmas 2010 022mostly christmas 2010 023mostly christmas 2010 024

The following are of a trio of Christmas finials by Penny McAllister.

mostly christmas 2010 025mostly christmas 2010 026mostly christmas 2010 027

A helpful guy brings the tree!

mostly christmas 2010 029

Too bad he can’t be enlisted to shovel the real thing!

mostly christmas 2010 030

A great nightlight with a bubble candle on top!

mostly christmas 2010 033

Wine gift bags and totes in a variety of delightful colors.  They are monogram-able, too!

mostly christmas 2010 032

Okay—so for the BIG question . . . Would this tree have looked better with multi-colors lights?

mostly christmas 2010 020

Do you use multi-colored lights in your Christmas décor or are you in the “clear lights camp.”  I’ve always used clear lights, but I love to see a house lit-up with multi-colored lights.  I bought some vintage multi-colored lights at the flea market this weekend.  I have to say, though, I love the hues of the vintage lights!  Does anyone know if you can find those hues in new bulbs?  If so, who makes them?

Fortunately, my husband agrees with my clear lights rule, but my friend and her husband disagree on the use of colored lights on their family tree.  They’ve reached a compromise—of sorts.  Do you have the same issue in your house?  How have you resolved your dilemma?

I’d love to hear from you . . .

Thanks for your indulgence!

signature

Friday, November 26, 2010

Thanksgiving Tablescape

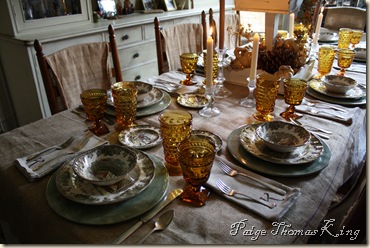
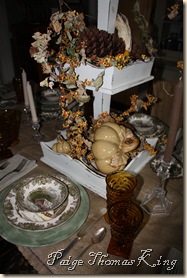
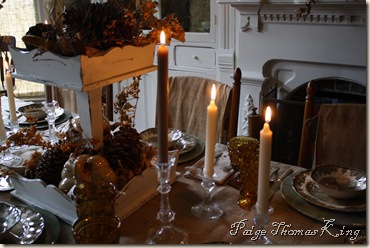
Our Thanksgiving table . . . .

dinner table settings 005

Set in advance of our guests arriving, just so I could have my daughter, Hunter, take these pictures for my blog.

T'giving table 1

My other daughter, Hannah, went into a very sullen mood when she found out she’d be sitting at “the kids’ table.” Her time will come.

dinner table settings 009 dinner table settings 011

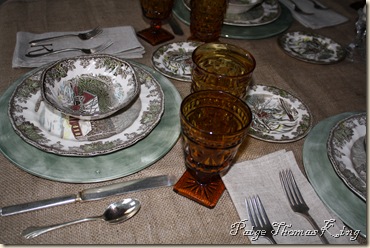
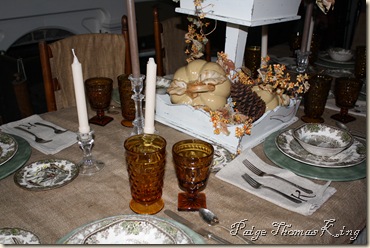
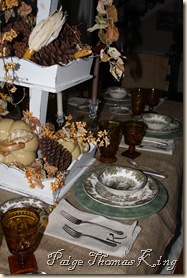
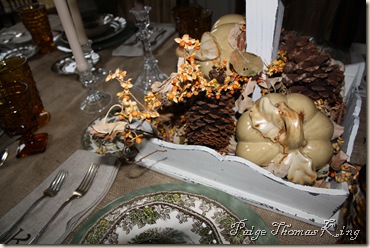
I used my green chargers purchased at Eddie Bauer Home about 13 years ago. Then added my Johnson Brother’s Friendly Village dinner plates, cereal bowls and bread plates.

dinner table settings 012

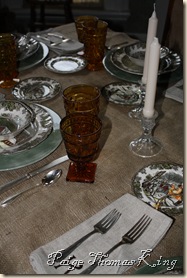
The amber cube patterned ice tea glasses from Whitehall have been collected here and there. The same is true of the amber wine glass from Colony in the Park Lane Pattern.

dinner table settings 013

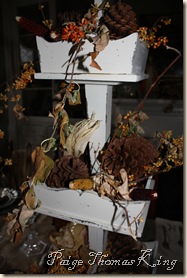
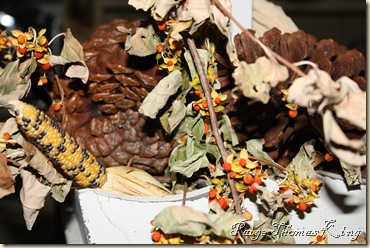
I purchased the three tier display at a local antique shop and use it for many different occasions. It’s almost too big for a centerpiece, but I figured my brother-in-law and son could look at each other later. I filled it with bittersweet, pine cones, miniature indian corn and a ceramic pumpkin trio.

dinner table settings 014 dinner table settings 015

The silver plate flatware is from my collection of mismatched patterns. (Took a quick inventory and there are a few pieces I “need.”) I try to find my dinner knives with a monogrammed “k” already on them—brings a little more of a challenge!

dinner table settings 006 dinner table settings 022 dinner table settings 024 dinner table settings 025 dinner table settings 026 dinner table settings 027

I used a large painter’s canvas for our tablecloth and topped it with a runner of burlap. The napkins are from Hodgepodge—a linen blend—which I recently had monogrammed.

dinner table settings 028 dinner table settings 029 dinner table settings 030

It didn’t take long to reduce the beautiful setting to the familiar site of carnage once we descended on those favorite dishes of smoked turkey (new and improved with “brining"), wild mushroom & sausage dressing, mashed potato casserole and sweet potatoes a la Glenn! It was wonderful, the company was great and great goodness, the DESSERTS!

Thanks for taking a look. Now I’ve got to get over to Between Naps on the Porch to look at all of the other Thanksgiving tables! I hope you visit, too, but be warned—it’s addictive!

Thanks for your indulgence!

signature

Wednesday, November 24, 2010

The Recipes from Our Open House

Every year, for our Open House, I put out the call for some help with baking—and every year, my friends answer this call!  Thanks to Märtha, Patty and Jennifer for making our event so wonderful.  You are very special to me!

This is the recipe for the apples I gave as a “free gift with purchase” during my open house (first 20 customers)—I originally got the recipe from a client (thanks Rocklan!)

apple w chocolate

Caramel Apples

Ingredients

Directions

Special equipment: 12 wooden sticks

Combine all the ingredients together, except for the apples, in a large saucepan, and stir with a wooden spoon over a medium heat until all the sugar has dissolved and is not gritty. Use a wet pastry brush to wipe around the sides of the pan to dissolve any sugar crystals that may form.

Clip a candy thermometer on to the side of the pan and bring the sugar mixture to a rolling boil over medium heat, and cook until the thermometer reads 236 degrees F. Pour into a stainless steel bowl and allow it to cool to 200 degrees F.

caramel apple pic

While the syrup is cooling, push a wooden stick into each apple from the top through the core. The stick should be deep enough so it won't fall off when you dip the apple into the caramel.

Line a cookie sheet with a silicone baking mat or waxed paper.

Dip each apple into the 200 degrees F caramel, watching carefully, so as not to dip your fingers into the caramel. Remove the excess caramel by turning the apples over the caramel bowl and then transfer to the cookie sheet. Repeat with remaining apples.

Chill for 15 minutes, then remove them from the silicon mat or waxed paper. Transfer to a serving platter and serve.

We dipped them in chocolate melted with butter, too.  Nuts and other flavors can be added as well.

The following recipe is the cake Märtha made—these are her instructions:

Snickers cake

This is what you use:

Crust:

6 egg whites
5 dl sugar (2 1/2 cup)
1 pk ritz crackers (4 sleeves)
250 g peanuts 
1 tsp vanilla
2 tsp baking powder
Chocolate icing

6 egg yolks 
1 dl heavy wiping cream (1/2 cup)
100 g butter (or one stick)
100 g sugar (3.5 ozs)
100 g dark chocolate (3.5 ozs)

This is how you do it:

Crust:
Whip the egg whites to a meringue. Add the sugar little by little when it has started firming up. Crunch the crackers to "chunky powder" and add it to the meringue, add the vanilla, the baking powder and the peanuts. Stir well. Pour the batter (it is really thick and almost forms like a ball) into a pan. Bake on 380F / 25 min. Let it cool.

Icing:
Use a pan: add the egg yolks, the cream and the sugar. Bring to boil (light bubbles) and let it boil until it thickens up - stir ALL the time!!!  When the cream is thick - take it off the burner and let it cool for just a little before you add the butter and the chocolate. (If the cream is too hot when you add the chocolate the cream might separate so make sure it has cooled a little – but not too much because then it'll be hard to melt it) Stir until all is melted and you have an even cream. Let it cool to almost cold before you pour it over the cold cake.

You will get the best result if you let it settle over night in the fridge :)

Here are the special request (I requested them) cookies that Patty made for the event—LOVE these things!

Graham Cracker Cookie Bars

· 20 graham crackers (individual squares), regular or chocolate

· 1 1/2 sticks butter (6 ounces)

· 3/4 cup brown sugar

· 1 teaspoon vanilla

· 1/2 cup chopped pecans

Preparation:

Line a jelly roll pan (10x15-inch) with foil; arrange graham crackers in the pan in a single layer. Combine butter and sugar in a heavy medium saucepan; bring to a boil over medium heat, stirring occasionally. Boil for 2 minutes; stir in vanilla and chopped pecans. Pour the hot mixture over crackers and spread evenly. Bake 10 minutes at 350°. Remove at once from pan to flat surface to cool. When cool, break into smaller pieces.

This is the recipe for the chocolate covered fruit-nut balls Jennifer contributed (lots of requests for this one!):

Fruit-Nut Balls

taken from "A Homemade Life" by Molly Wizenberg

They do better if made a couple of days ahead, and they will keep in the refrigerator for two to three weeks.

1 cup walnuts

1/2 pound pitted dried cherries

1/2 pound dried figs

1/2 pound pitted dried apricots

1/2 pound pitted prunes

1 to 2 tablespoons Grand Marnier, brandy, or apple cider

1/2 cup powdered sugar

10 ounces semisweet chocolate, coarsely chopped

Put the walnuts in the bowl of a food processor fitted with a steel blade, and pulse to chop finely. Transfer to a large bowl.

Return the food processor bowl to its base and add half of the dried fruits. Pulse to chop finely. You don't want to turn the fruit into a gummy paste, but you want it to be chopped finely enough that there are no pieces larger than a pea. Add to the bowl with the walnuts.

Repeat with the remaining dried fruit. When all the fruit is finely chopped, stir the fruit-nut mixture well. Add 1 tablespoon Grand Marnier and stir to incorporate. Pinch off a small wad of the mixture and squeeze it in your palm: does it hold together in a tight ball? If not, add another tablespoon of Grand Marnier.

Put the powdered sugar in a small, wide bowl or pie plate. Pinch off bits of the fruit-nut mixture and, squeezing and rolling them gently in your hands, shape them into 1 to 1/2 inch balls. Roll each ball in powdered sugar to coat, shaking off any excess, and place them on a rimmed baking sheet. Set aside at room temperature, uncovered, for 24 hours.

To finish, line a second baking sheet with parchment paper or silicone liner. In a heatproof bowl set over a pan of simmering water, melt the chocolate, stirring occasionally, until smooth and loose. Remove from heat.

Working with one ball at a time, use a small spoon to dollop a bit of chocolate on top. Shake the ball lightly to coax the chocolate down its sides (only the top half or so, as if the ball were wearing a chocolate hat.) Place the ball, chocolate side up, on the lined baking sheet. Repeat with remaining balls.

Slide baking sheet, uncovered, into the refrigerator and chill until the chocolate has hardened, about 2 hours. Tuck each ball into a small paper candy cup. Store in an airtight container in the refrigerator for up to three weeks.

Yield: 45 to 50 balls.

Don’t forget you only have until midnight tonight to enter to win some great prizes from Hodgepodge—visit this post for more info.

Thanks for your indulgence!

signature

Sunday, November 21, 2010

The White Window

The tradition at Hodgepodge has become that we dress one window in an indoor/outdoor theme and the other window in a winter white theme. I’ve already shared the indoor and outdoor “rooms” of the other window and now . . .

wa deco 6

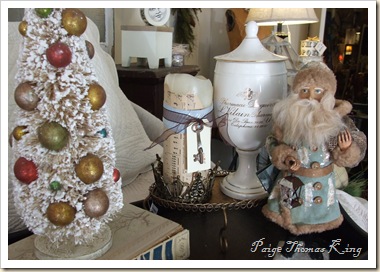
This is the scene set on a serving tray on our daybed. The bottle brush tree with vintage-look ornaments and flocking is wonderful. Then there’s the European-style Saint Nicholas with his lantern. The pharmacy canister, along with the pillar candle I wrapped in sheet music and tied with a ribbon round out this vignette.

white room deco 2

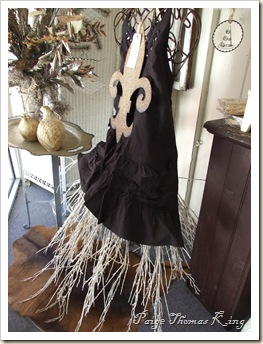
I dressed the mannequin in one of our little black dress aprons and gave her a skirt of flocked branches. The Fleur de Lis is from the Wendy Addison collection.

white room deco 3

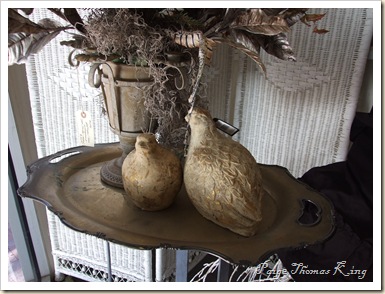
This partridge pair is one of my favorite decorative accents to use throughout the holidays. With just the right amount of gilt, these terra cotta birds add the perfect touch to your Thanksgiving, Christmas or New Year’s decor. We had them last year and they sold-out before I could grab a pair for myself . . . that won’t happen this year!

white room deco 5

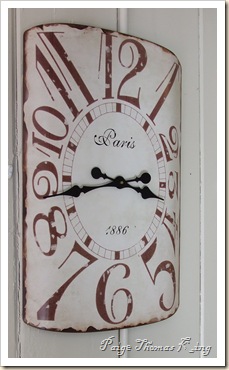
As my life seems to be controlled by these things, why not choose clocks which me happy to be a clock watcher? This large metal clock has a slight curve and a great weathered appeal.

white room deco 6

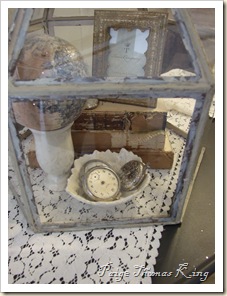
Under this conservatory-style cloche you’ll find a stack of vintage books, along with some pocket watches and an old-world-style globe ornament.

white room deco 7

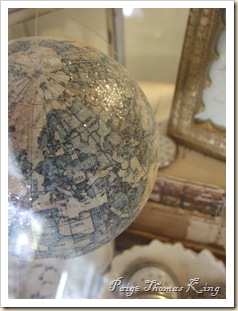
A tight shot of the globe.

white room deco 8

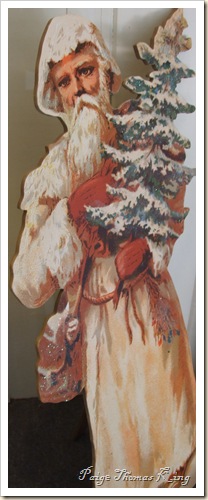
This Father Christmas wood cut-out stands about 3 feet tall and looks great on the hearth, in the foyer and on the porch.

white room deco 9

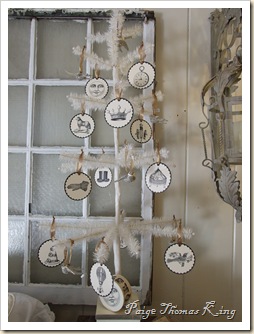
Our white feather trees have been part of the Hodgepodge decor since we first opened. I love this simple display of Wendy Addison’s collection of icon disc ornaments and glitter birds.

white room tree

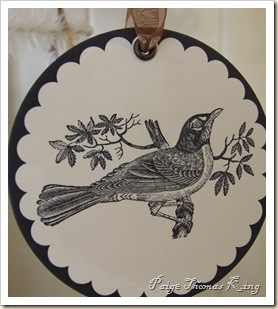
The icons are printed on a heavy cardstock and hung from a gorgeous bronze ribbon. They come in a set of twelve.

wa deco 1

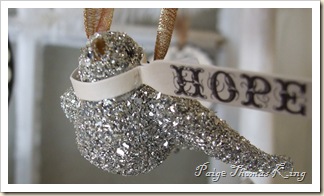
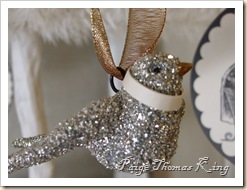
The glitter birds come in a set of three. As with all of Wendy’s glitter designs, they are made using real glass and silver glitter, so their vintage appeal is undeniable, especially as they patina with age.

wa deco 2 wa deco 3

More of Wendy’s creations round out the White Window this year.

wa deco 5

Thanks for taking a look. If you’re in the area I invite you in to see these items for yourself. They would work in almost any home.

Speaking of which, I’m wondering . . . how do you decorate for the holidays? Do you choose a specific color theme? Do you have multiple trees? What are your traditions? Or, are you doing something totally new this year?

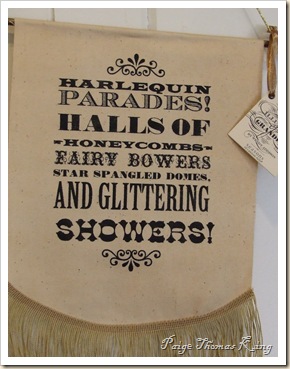
Tell you what, leave your comments here for a chance to win one of these gorgeous Wendy Addison Eiffel Tower ornaments, along with the Harlequin Parades banner seen in the first photo. Just tell me a little about your holiday decorating for a chance to win! For more opportunities—become a follower here and on facebook and/or link to this contest on your own blog! Just remember to tell me all of the ways you’re participating!

(Additional Info added later--i'll close this little contest on Weds, Nov 24th--Happy Thanksgiving!)

Thanks for your indulgence!

signature

Friday, November 12, 2010

Christmas tree—the other half

Now for the inside room of the window display . . .

this side of the window is decked-out in a vintage whimsy style.

whimsy deco

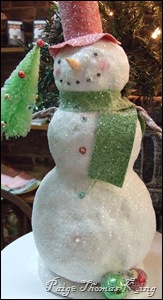
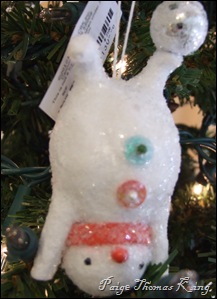
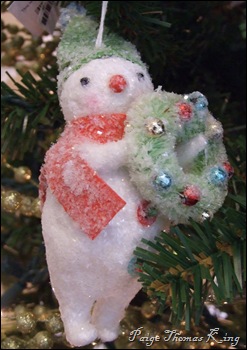
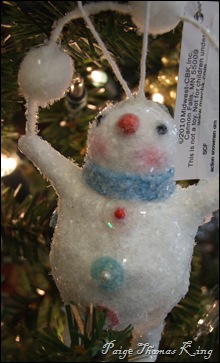
these snowmen are playing and tumbling through the tree . . .

whimsy deco 1 whimsy deco 2

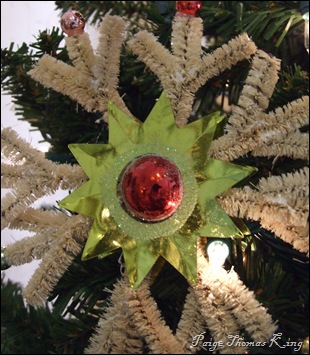
I love these pipe cleaner snowflakes with their foil reflector centers . . .

whimsy deco 3

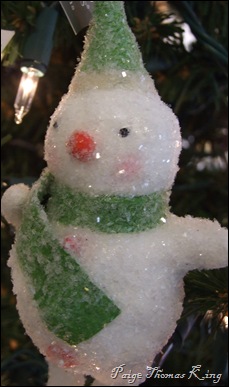
More snowmen . . .

whimsy deco 4 whimsy deco 6 whimsy deco 7

a spray of green glitter adds sparkle to the tree.

whimsy deco 8

a cone to fill with treats and a reflector star . . .

whimsy deco 9 whimsy deco 10

peace . . . joy . . . noel! these ceramic spheres are perfect for almost any holiday display.

whimsy deco 11

mr. deer is part of a trio of characters from the late penny mcallister.

whimsy mantel 1 whimsy mantel 2

you can bring a vintage feel to any home with this bottle brush and ornament wreath—a personal favorite!

whimsy mantel 3

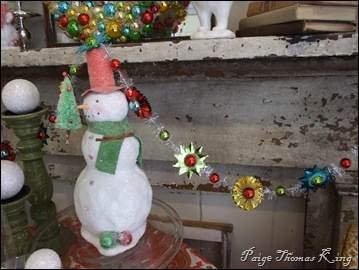
these snowmen can carry you through Christmas and beyond!

whimsy mantel 4 whimsy mantel 5

this reflector garland will add the vintage whimsy to your tree, your mantel, your staircase—it’s up to your imagination!

whimsy mantel 7

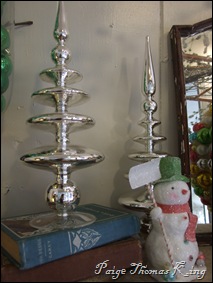
mercury glass trees with a space odyssey appeal . . .

whimsy mantel 8

Perhaps you’ve seen something that will add some whimsy to your Christmas decor.

more trees to come, plus recipes from our open house!

thanks for your indulgence!

after thought--i was thinking--while i'm generally a white-lights-on-the-trees only person, i was thinking i would LOVE multi-colored lights on this tree. what do you think?

signature

Related Posts with Thumbnails