Wednesday, December 16, 2015

Welcome Friends and Neighbors

 
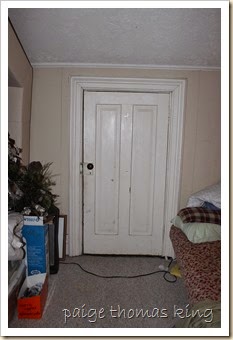
I recently promised readers of my weekly column in The Leaf Chronicle that I would show a few more photos and give some tips for painting a paneled door.  In this case, it was my front door:


The photo above is the “before.”  It is worth noting that the door was painted the same color as the shutters you also see in the photo.  I mention that in order to give you an idea how cave-like the entrance felt to me.

It makes total sense to have such a well-protected entrance—especially here in Florida, aka: the land of pop-up showers.  But the dark door and consequently dark entrance was not very welcoming.  Since I am new to the neighborhood and in desperate need of friends (lest I wear out my welcome with the one friend I have here), I decided my first home improvement project would be to paint the front door and sidelights.

I take a moment to note that those sidelights are indeed amber. 

I jumped into this project fully intending to replace them as soon as I finished the paint job.  I, however, have since been provided a quote for new clear glass and, once I picked myself up off the floor, decided that part of the project will wait until after the new year.

So, back to the project at hand. 

First, I spent several weeks studying paint chips in order to choose a color which would coordinate well with all of the existing colors already “on” the house: the painted brick, the shutters, the “naked” brick AND the siding on the second level.  That is a lot to consider.

I worked paint samples in the closest match I could find for each of the existing colors.  (I didn’t bother with trying to match the naked brick because it is my intention to paint it to match the painted brick.) 

I used Behr Marquee, which incorporates a primer and one-coat “advanced stain-blocking” paint.  (When I went to check the can, I realized I was operating under the mistaken assumption that it was a “one coat” paint—wishful thinking.)  Anyhoo, it was a custom mix.  In other words, I had them color match a sample from another brand—the color very closely matches Benjamin Moore Wythe Blue.  (I just happen to like Behr products.)

On a day that the weather seemed like it was going to allow me to keep my dogs out back in order to allow me to leave my front door open most of the day, I decided to get started.

First, I lightly sanded all of  the surfaces I intended to paint, then I cleaned the same area.  (Generally speaking I loathe the prep work, but since this was our front door, I decided I should make every effort to make  sure I did my best.)   I taped around the door knob and plate, as well as around the knocker; they both have a great patina—I love them!

Okay, ready to get down to business, I opened the paint can and dipped-in my brush.  Here is a brief outline of my approach:

First, I painted the sidelights.  I used pretty much the same approach doing them as I did on the door, but took more photos of the door.  So onto the door . . .

I started on the door by filling in the flat face of each panel, then went around the beveled perimeter of each panel.


Next I painted the vertical section in the middle of the door—those pieces are called the “stiles.”  (In case you want to impress your friends and neighbors when that ask about your process.)

After you load your brush, be sure to start in the center of the stile, that way you can feather the paint out as you approach the edge where it meets the horizontal sections.  That will really help with the finished appearance.

(You can see by the photo below that I failed to take a photo before I had moved to step three.)


When you start painting the the horizontal sections (or “rails”), start at the top and work your way down to the bottom rail.


Finally, you paint the vertical stiles on each side.


I then removed the tape and used a small detail brush to carefully paint around the knocker and door knob plate.

I wish I could tell you that was it, but unfortunately the “advanced stain-blocking” paint required a second coat.  No worries, however, because I loved the results:


Now that I am looking at it again, I’m thinking those new sidelights will be installed sooner rather than later. 

Oh, and I think I should defend myself by offering up the following alibis:  I have been on the hunt for a new doormat—if you have any leads, please leave them in the comments section, but I am fairly particular. Also, I have decorated for Christmas—well, the entry way, that is.  I think I will include that photo in my new banner collage . . . still need to do a quick tutorial to remind myself about how I use to make those!

All I know is, it’s good to be back on my blog.

PS--now that I just spent one hour trying to publish this dang thing and trying to deal with the squirrely blogger system, I think I am remembering why I walked away before . . . I will attempt to figure out why I am having so much trouble.
Thursday, December 10, 2015

New Beginnings (. . . as trite a it sounds)

So, it’s been a while—like nine months—but who’s counting? 

Me, I am counting. 

I am terrible with remembering dates.  l know the year I was born, the year I got married and the birth year for each of my three children—for any other date, my eyes roll back in my head as I either add or subtract from hear of those significant years.   But my shortcomings or perceived failures—they’re locked in.  Nope—never forget those.

Anyhoo, while there are many things I will never (did I just type that—adding the italicized emphasis, too???) go back a “do over” (a curly perm, my middle school years and being a shop owner come to mind), I am pretty sure I will keep trying to revive this blog.

To start with, it has served as a sort of journal for me over the years.  (Reference the first paragraph where I expose my short term memory challenges.)  I have come back to this blog time and time again to refresh my memory about rather remarkable events in my life; it has also served as a handy recipe receptacle, too.  Just the other day, I used the handy-dandy search option to find the recipe for our family favorite Pumpkin Cookies.

I also find that I am actually motivated to do things—to tackle projects, to try recipes and to, basically, explore and delve into other shenanigans as opportunities arise—just so I can share them here.  Basically, it’s a public journal.

So, here I am, blogging again.

A quick update . . . we have had made some serious changes in our lives since March—not the least of which was to sell our beautiful, historic home and move to the panhandle of Florida, but more on that later.

One thing that hasn’t changed is that I still write two weekly columns for Clarksville, Tennessee newspaper, The Leaf Chronicle.   One of those columns is a lot like a blog entry—I just write about things going on with my family, home improvement  and decorating projects. I find that, occasionally, I want to include more information and photos than the printed paper can allow or subscribers care to read/see.  So, I’ve decided to stat using my blog to (1) supplement my column and (2) share some of my experiences as I, once again, attempt make a house into our home.

And, since I just hit “send” for my most recent column submission; and, since in that column I direct readers to my blog for more details on my most recent project, I thought I better get to it.

And there you have it.  If you are new to my blog, I welcome you.  If you’re a tried and true friend or fan, welcome back!  I hope to hear from you often.  Thanks for joining me here.

Fondly,

signature

PS—I’ll update my photo banner later—first, I have to remember how to do it!

PSS—if you’re here to read about my newly painted front door, stand by—it’ll magically appear here this evening!

Thursday, March 12, 2015

Please, don’t put a bird on it.

Sometimes, old houses are for the birds.

Naturally, I am prepared to give you a “for instance” to support my thesis.

A couple weeks ago, during Middle Tennessee’s version of snowmageddon, I decided, as there was no leaving the house, I might as well get busy on at least one of the chores I had been avoiding. 

So, I gathered together the supplies I needed to finish painting the kitchen.  I believe I mentioned that I really dislike the prep-work required for most painting projects in our house.  Between taking down the numerous decorations, to cleaning and patching the walls—I just get tired thinking about it. 

The actual doing is much worse!  If I had a dime for each time I told myself “there, that was the last time I’ll need that caulk,” I’d have enough money to pay someone else to do this chore for me.

If there is one plus to this whole ordeal, however, it has to be the fact that I have now got some mean caulking skills!  I can lay a bead of caulk like a boss.

Okay, back to the birds.

So, there I was on day four of my “little” painting project, the end was in sight and I was wrapping-up the second coat on the wainscotting, when I thought I heard someone tapping on the door to our storage area.  I had my headphones on listening to my audio book (All the Kings Men by Robert Penn Warren, a resident of Clarksville, TN) so I wasn’t sure if I had actually heard it.  I kept painting—knowing full-well that I had heard something and that something was going to take me away from the project at hand.

all the king's men

I knew that the “something” was going to be a critter—not one that we had purposefully invited into the house—therefore, I decided to go investigate via the other access door to the storage area.  When I arrived in the playroom (yeah—my youngest is 18 . . .) and turned toward the door in question, I saw our cat, Roxy, anxiously listening at said door.  Any hope of having been “hearing things” completely dissolved.

2015-03-10 19.48.12

I decided nothing else would do and I would have to open the door to see.  Roxy thought this was a great idea and volunteered for a reconnoiter mission.  While the door was briefly open—I counted two birds—and quickly shouted for some assistance from my eldest.

I proceeded to explain the situation to her, so we could develop a plan of attack, but she kind of got stuck back at the part where I mentioned that her cat was trapped with the birds.  I believe her exact words were, “Mom?!? WHAT?!?!  That’s two against one!!!”

Consequently, you can imagine my reticence at updating the report the next time I opened the door to find that we actually had three birds.  

Quickly, we began to formulate our plan—the first iteration involved a hockey mask and my youngest daughter’s boyfriend (at the time, he was sitting on our sofa downstairs and yet unaware of our little dilemma).  Then we remembered, we don’t own a hockey mask.

But we do have a fencing mask—oh, hellstotheyeah—much better.

I swear it wasn’t part of my plan, but as her cat was in there with the killer Starlings, my eldest volunteered for the mission.  (She is actually the one who originally rescued Roxy from a life on the street—or roof, as was the case; she had a habit of rescuing this kitty.)

If this had happened last year, it would have been as simple as walking in and opening the window—wave your hands around a little and watch them fly out.  However, since we had replaced all of the windows in this part of the house and made sure they all were fitted with screens, matters were complicated.

So we headed downstairs for a a quick lesson on how to remove screens (one of those details missing from the lives of children raised in old houses), then she dressed for battle. 

She grabbed an ADU shirt belonging to her ex-boyfriend (naturally not caring if it was subjected to bird excrement—hoping, in fact . . . just a little), her bother’s fencing mask and a pair of my gloves.

2015-03-10 19.47.59

It was a matter of minutes before she was reporting successfully banishing two  of the little darlings, so I dared a peak in to see if Roxy had moved closer to door, which she had—so had, unfortunately, the third Starling. 

I don’t know how it happened, but my ninja-like reflexes allowed the cat to escape, but caught the dang bird as he was passing through the door.  That’s right—I had a bird caught in between the door and the jam.  I was applying just enough pressure to keep it from flying into the house—kicking myself for not closing the door to the playroom.  I felt horrible!

I called downstairs to my other daughter and her boyfriend for help.  I told them to bring a box to help catch the bird.  They both came  running, but daughter held back—wanting to be part of the action, but deathly afraid that the bird would come flying at her.

Boyfriend positioned the box in front of the gasping bird and we prepared to allow the door to open and the bird to escape (hopefully into the box) when daughter #1 announces from the other side of the door that ANOTHER bird had flown into the storage room and was by the door!  So, we wait for her to corral that bird and encourage it back outside, but by the time we got the “go ahead” our poor creature had breathed its last.

I felt awful.  Then I remembered how a flock of Starlings had swooped in on our recently refreshed bird feeders and decimated the supply which I had hoped would last until the following day. 

I got over it.

signature

Sunday, February 15, 2015

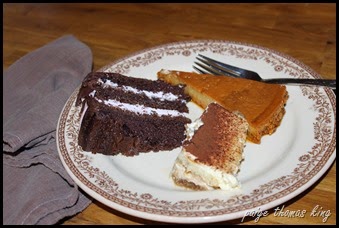
The Dessert Trifecta

2015-02-12 16.23.38

Dessert #1

Kahlua Flan

kahlua flan

photo credit:  Food Network.com

Ingredients
Directions

Preheat the oven to 350 degrees F.

In a small saucepan, cook the sugar over medium heat until it starts to melt. Lower the heat and cook until caramelized to a golden brown. (Do not stir or touch the sugar, but swirl the pan to melt evenly.  This takes patience and attention, so if you’re like me and get distracted when you remember you were going to sew a button onto you jacket—set a timer or assign a small child to this task.)

Pour into a metal flan mold or 9-inch cake pan. Turn the dish and swirl to evenly coat the bottom.  (I did this on a chilly night and used a ceramic tart plate—it was cold and the caramel hardened quickly—therefore it did not “swirl or evenly coat, but it came out just fine.  However, next time, I will warm the plate first.) Let caramel cool and harden.

Place the dish in a larger roasting pan and add hot water to come halfway up the sides of the baking dish. In a large bowl, whisk the eggs. Add the condensed and evaporated milks and Kahlua and whisk well to blend. Pour into the prepared pan. Bake until set and just firm in the center but still jiggles slightly, 50 minutes to 1 hour. Let cool on a wire rack. Refrigerate until well chilled, at least 2 hours.

To serve, run a thin sharp knife around the rim of the flan. Place a platter or large plate on top of the flan and gently flip over so the plate is on the bottom. Lift away the mold. (If you let it cool overnight—like I did—and have a difficult time getting it to loosen from the pan, fill the roasting pan you baked it in with warm water and place the baking dish in the warm water for 30 seconds or so—this should help loosen it.)  Garnish with powdered cocoa and top with Mexican chocolate shavings.

Cut into wedges and serve immediately.

Recipe courtesy Emeril Lagasse, 2003(—notes, courtesy of me.)


Dessert #2

Tiramisu

tiramisu

photo credit:  Romulo Yanes

Ingredients

  • 2 cups boiling-hot water *
  • 3 tablespoons instant-espresso powder *
  • 1/2 cup plus 1 tablespoon sugar, divided
  • 3 tablespoons Tia Maria (coffee liqueur—I used Kahlua)
  • 4 large egg yolks
  • 1/3 cup dry Marsala
  • 1 pound mascarpone (2 1/2 cups)
  • 1 cup chilled heavy cream
  • 36 savoiardi (crisp Italian ladyfingers; from two 7-ounce packages—I used the soft ladyfingers—see notes below)
  • Unsweetened cocoa powder for dusting

Preparation

Stir together water, espresso powder, 1 tablespoon sugar, and coffee liqueur in a shallow bowl until sugar has dissolved, then cool.

(Be careful with the following step—it’s easy to overheat everything.  If you leave some whites in your egg yolks, they will cook-up—just pluck them out when you’re done.)  Beat egg yolks, Marsala, and remaining 1/2 cup sugar in a metal bowl set over a saucepan of barely simmering water using a whisk or handheld electric mixer until tripled in volume, 5 to 8 minutes. Remove bowl from heat. Beat in mascarpone until just combined.

Beat cream in a large bowl until it holds stiff peaks.  (Did you know that this works best when you use a ceramic or glass bowl that you’ve pre-chilled in the freezer for a few minutes?  Throw the mixer beaters in, too.)

Fold mascarpone mixture into whipped cream gently but thoroughly.

Dipping both sides of each ladyfinger into coffee mixture, line bottom of a 13- by 9- by 3-inch baking pan with 18 ladyfingers in 3 rows, trimming edges to fit if necessary.  (If you use the soft ladyfingers, pour about 1/3  to 1/2 of your espresso mixture in the bottom of you baking dish and then place the ladyfingers in the mixture.)  Spread half of mascarpone filling on top. Dip remaining 18 ladyfingers in coffee and arrange over filling in pan.  (For the soft ladyfingers, I just placed them on top of the cheese layer and brushed them with the espresso mixture.)

Spread remaining mascarpone filling on top and dust with cocoa. Chill, covered, at least 6 hours.

Let tiramisu stand at room temperature 30 minutes before serving, then dust with more cocoa.  (I used a basic, store brand cocoa powder, but will look for something better for the next time.)

*I used a dark roast coffee and brewed two cups in our single cup brewer.


Dessert #3

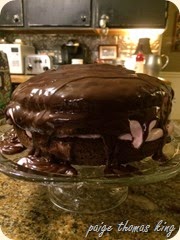
Hunter’s Birthday Cake

(aka:  Chocolate cake with Raspberry Crème Filling and Ganache topping)

hunter's cake

(alibi:  the cake isn’t lopsided—much—that’s the crème filling oozing out!)

Okay—a little back story.  My dear, talented friend, Kate, is one of those people you wish you could hate, but you want so badly to be just like her you find yourself dancing around her like Chester following Spike.  (If you grew-up with Looney Tunes cartoons you understand.)  She introduced me to a version of this cake—although she went to effort of making it as a rolled cake (that’s love)—on the occasion of my birthday. 

Unfortunately, she then moved away and was unable to show me that kind of love again.  So, desperate for that deliciousness, I contacted her and begged her for the recipe, which she rattled off the top of her head while walking on the treadmill and watching the news, I believe.  (Yeah—she can do it all.)  I decided to make that for my eldest daughter’s birthday because it had a pink filling and it her birthday is in February.

Now, Kate provided a wonderful, homemade rich chocolate cake recipe, but I cheated and bought the richest sounding chocolately, chocolate cake mix available at the commissary.  I have made it using the chocolate cake recipe available on the Hershey’s Cocoa Powder container, but this year I used a mix again—as I was just about baked-out at this point!

So, pick your favorite chocolate cake recipe or box mix and prepare it using two round cake pans.  Then do this:

While the cake is baking, toss a package of frozen raspberries in a saucepan and warm with 2 T of light corn syrup until bubbly and the liquids thicken.  Now, strain the raspberries, reserving the juice.

Now, whip 1 cup of heavy whipping cream until firm peaks form.  Gently fold in the reserved juice in small amounts—stop when the whipping cream appears to be thinning to the point that it will break down.  Refrigerate until the cake cools.

For the Ganache, you’ll need 1/2 cup of heavy cream and 8 ounces and (if you like) 1 T raspberry liqueur (I use Chambord).

Now—to assemble the cake:

If you are feeling really fancy—slice each cake round into two cake rounds (this will make you feel better about not making a roll cake); thus, you will have four layers and consequently more room for the crème filling.  (I suddenly remembered this step after I had already spread the raspberry crème on the first full cake round—so I cut the second round and ended-up with three layers.)

Assemble the cake, spreading the raspberry crème in between each layer.  Refrigerate while you prepare the ganache.

For this very fancy sounding, yet incredibly easy topping.  (By the way, in case you’re wondering, it’s pronounced “gah-nosh”—really takes the fancy out of it, doesn’t it?)   All you do is melt the ingredients together in a double boiler.  Once melted and smooth—spoon over your prepared cake.  You can take your time and painstakingly smooth the ganache over the entire cake OR you can just spoon it onto the top layer and let it drip over the sides (I usually opt for the latter).


Okay—now that we’re all in a sugar induced coma here at the King Kompound, I’ll let you go gather your ingredients so you can join us!

Thanks for your indulgence~

signature

Monday, February 9, 2015

Put Casters on It

This is a philosophy I developed for just about any piece of furniture I had at the shop—put casters on it.  That way, when the mood hit me to move things around—generally, just before closing time so Patty would walk into my typical chaos the next morning—I could move the large pieces of furniture by myself.

While I had become pretty adept at loading large pieces onto a four-wheel furniture dolly all-by-my-lonesome, the casters were much easier on the back.

Unfortunately, I didn’t come-up with this brilliant philosophy until I was just about ready to close.  I had thought of it for large pieces which, ironically, remained rather stationary—like my check-out desk.  But, especially on the pieces I had custom made, I started asking Jeff to put casters on those.  It made delivering those items easy and, should the clients desire, they could be easily removed.

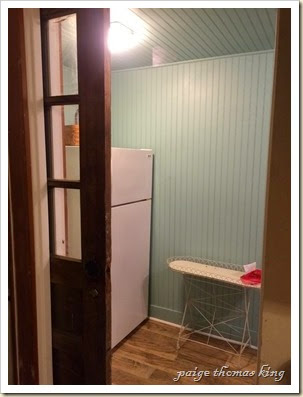
So, when I went in search of a piece of furniture to fill a void in our newly renovated laundry room, I was surprised that it took me a while to figure out what to do. 

I had this space . . . and heaven forbid it just remain “space.”  So, the space was screaming for something to keep it company.  My first fix was this:

laundry after 2

You can see (just barely) the almost ideal table—it is an absolutely darling little metal table (on casters) which I had at the shop and just couldn’t let go.  It’s made its way around the house and I am determined to find the perfect location in this house (or another).

In the meantime, however, it didn’t work here.  It was way too long to allow us to open the refrigerator door.  And, though it is on casters, I didn’t want to scoot it out of the way every time we need something from the fridge.

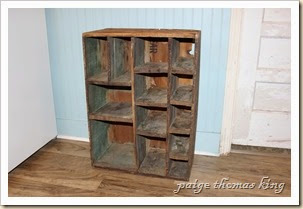
Then, while out shopping with my mom, sister and daughter, I came across this:

2015-02-07 17.09.02


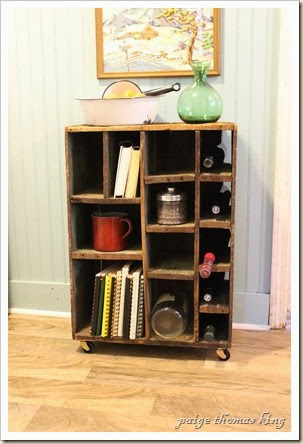
As you may have already inferred from the background—I brought it home.  It’s a large crate which had been divided into cubbies of varying size—which made it perfect for my junk of varying size.  (Did you notice that wonderful blue-green paint on the interior?)

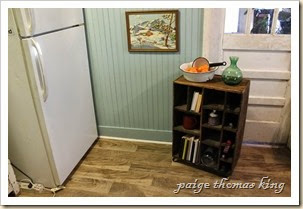
As you may have also already inferred, it is too large for the space, too.  It is not as wide as the other piece, but it is close.  Yet this pieces had so much more to recommend itself for this space that I decided I must make it work.

So, I scooted it down as close to the door jam as I could and proceeded to load it with junk (those cubbies on the right are the perfect size for wine bottles).  The refrigerator door opened, but I couldn’t access the crisper drawer on the bottom, right-hand side.  Oh well—I could make do without it—this is, after all, our “bonus” fridge.

Then it occurred to me . . . put casters on it!  And that I did.

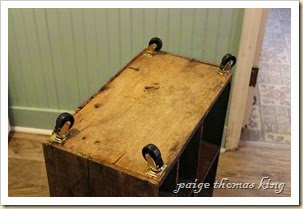
When you are adding casters, you need to make sure you get the correct size and construction for your needs.  This crate is fairly light weight, but with all of the stuff I planned to load into it, I need to consider the weight capacity.  I also decided on a rubber wheels, as opposed to plastic or metal, since it would be rolling around on our new, vinyl laminate flooring.

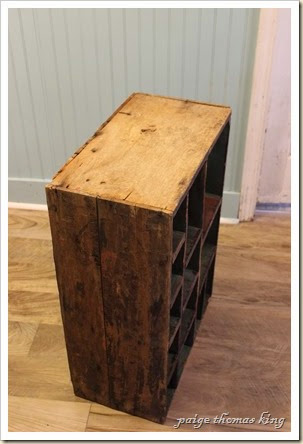
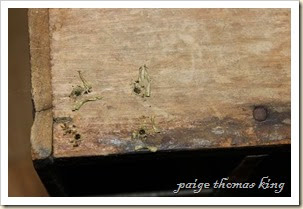
I emptied the crate and flipped it over to expose the bottom—picked off the mounds of dog hair which had already attached there—and began marking the holes for drilling. 

2015-02-07 17.13.10


(This is one thing I have to make myself do—pre-drilling.  It is much like prep work for painting—a necessary evil.)

2015-02-07 17.25.312015-02-07 17.32.57

And here we have the final product—all loaded down with junk for storage (those wine bottles I mentioned and a portion of my cookbook collection) and display.  (I’ve gotta learn to control that flash!)

2015-02-07 17.42.59

Bonus:  it is ready to roll out of the way to allow access to that all important crisper drawer!

2015-02-07 17.43.30

Are you a fan of casters?  Have you found a unique use for them or a place where you could not do without them? Do tell!

Thanks for your indulgence,

signature

Tuesday, January 27, 2015

I'm Back-ish . . .

Long time, no nothing.

Makes me think of that quote from Dances with Wolves, when Timmons and John Dunbar come across the skeleton on the prairie, Timmons says, "I'll bet someone back east is saying, 'Now why don't he write?'"

Well, I'll tell you why I haven't written--I wasn't sure I had anything worth sharing.

For those of you who are already familiar with my blog, you'll likely remember I closed my shop (Hodgepodge) at the end of December 2013.  I fully intended to keep blogging, because I really enjoy writing and sharing ideas, but I didn't.  I can make all kinds of excuses, but I recently read a quote that sums up the thoughts about that . . .

So, here's to progress!
I had promised to get something up on my blog by the end of the now-recently-passed weekend. Being that it's Tuesday, I thought I better offer up an excuse umm . . . err . . . disclaimer.
I sat down on Sunday--really I did--to write a post, but then I realized how out-of-date most of the information in the margin of my blog was.  Having not been on Blogger for about a year--it took me quite some time just to find my way around again.  (Still floundering.)  
I started by removing the widgets related to the shop:  signing-up for emails; articles published in magazines, and awards I received (those could have me on a therapist's sofa for days, but I digress). Then I got mired in my outdated profile--what to write there?  (Well, you can see what I settled on--hopefully, I'll be more inspired when I revisit it.)  Still trying to remember how to update my photo (wish I still looked like that . . . I think the photo is at least 7 years old!). 
And now, for something of consequence . . . something to bring you back . . .
Frankly, I'm not sure I can give you that right now, but as I suggested in my new, not necessarily improved, profile--I'm going to share my journey with you.
Things I know am pretty sure I have ahead:
1.  Repairs and renovations to this old house.
2.  Family life--to include two graduations--our eldest from college and our youngest from high school.
3.  More of my serial volunteer activities.
4.  Dog training (no new puppies--same ol' knuckleheads).
5.  A concerted effort to strengthen my spiritual relationships.
6.  A concerted effort to strengthen my earthly relationships.
7.  A concerted effort to strengthen my body.
Okay, I've got to pull the proverbial trigger and get this posted.
I hope to find you back here again soon.  Please leave me your comments--I've missed you.

Tuesday, January 28, 2014

Post Christmas Dinner

I promised the readers of my weekly column in The Leaf Chronicle a copy of our menu for Christmas Dinner (which wasn’t prepared until the following Saturday).  I love having the menus of tried-and-true meals, served by real people, for my own use, so perhaps you will find some appeal in this menu.  If you have offered the same thing on your blog (or elsewhere) I hope you let me know—I’d love to check-it-out.

The menu:

Rosemary Prime Rib

Brussels Sprouts

Bourbon Carrots

Barley Casserole

Almond-Citrus Salad

Rosemary Prime Rib

6 garlic cloves, pressed

2 tsp salt

2 tsp pepper

1 tsp crushed rosemary

2 tbsp olive oil

1 (7 lb) 4-rib prime rib roast, chine bone removed

1 c sour cream

2 tbsp lemon juice

2 tbsp prepared horseradish

Combine first 5 ingredients in a small bowl; rub over roast. Let roast stand at room temp for 30 mins.

Bake at 450 degrees for 45 mins on lower rack of oven.  Reduce temp to 350 degrees and bake 45 – 50 mins or until meat thermometer inserted into roast registers 145 degrees (medium rare) or 160 degrees 9medium).  let stand 20 minutes

Combine sour cream, lemon juice, and horseradish; serve with roast.

Southern Living 2003 annual recipes

(For the record, we prepared our roasts for 45 minutes in our oven, then moved them to the grill, which we had preheated to a medium heat.)

Brussel Sprouts with Bacon

4 slices bacon, chopped into one-inch pieces

1 lb baby Brussels sprouts, thawed

1/2 c heavy cream

1 tbsp cream

1/2 tsp salt

1/4 tsp pepper

Cook bacon in large skillet over medium heat, remove cooked bacon.

Cook sprouts in bacon drippings until they start to brown; add cream, salt and pepper.  Cover cook over medium-low heat for 15 minutes; add lemon juice.  Top with cooked bacon just before serving.

This is actually a conglomeration of a few recipes—not sure where it originated.

Bourbon Carrots

3 c water

1 1/2 lbs baby carrots

1 tbsp sugar

1/2 tsp salt

2 tbsp butter

3 tbsp brown sugar

2 tbsp bourbon

Bring water to boil, add carrots, sugar and salt.  Return to boil and cook 5 minutes or until tender.

Melt butter and brown sugar in a large skillet over medium-high heat.  Stir in  carrots and cook stirring occasionally, 2 –3 mins or until well coated.  Add bourbon and cook, stirring occasionally, 3 more mins.

Southern Living 2003 annual recipes

Barley Casserole

1c barley

1/4 c butter

2 medium onions, chopped

4 ozs. mixed specialty mushrooms, chopped

4 c chicken broth

Melt the butter in a sauce pan, add barley and cook—stirring frequently—until barley is browned.  add chopped onions and mushrooms to sauce pan; cook until tender.  Transfer to a casserole dish, stir in chicken broth.  Cover and bake at 350 degrees for 1 1/2 hours.

Charlene Saunders Thomas (my mom)

Almond-Citrus Salad

2/3 c vegetable oil

2 tsp grated grapefruit rind

1/2 c fresh grapefruit juice

1 envelope Italian salad dressing mix

1 grapefruit

2 oranges

1 avocado, peeled and sliced

3 c torn spinach

3 c torn leaf lettuce

3 c iceberg lettuce

1/2 c sliced celery

1/2 c chopped green bell pepper

1/4 c Sweet-and-Spicy Almonds

Combine oil, rind, juice and dressing mix in a jar; cover tightly, and shake vigorously.

Peel and section grapefruit and oranges, and place in a large bowl.  add avocado and next five ingredients.

Add dressing, tossing to coat.  Sprinkle with Sweet-and-Spicy Almonds.

serves 8

Sweet-and-Spicy Almonds

1 c sliced almonds

1 T butter, melted

1 1/2 t sugar

1/4 t ground cumin

1/4 t chili powder

1/8 t dried crushed red pepper

pinch salt

Combine almonds and butter, stirring well.  Combine sugar and remaining 4 ingredients; sprinkle over almonds, tossing to coat.  Spread on a lightly greased baking sheet.

Bake at 325 degrees  for15 minutes, stirring occasionally; cool.

(Make a double batch to use as an appetizer or hostess gift.)

Southern Living 1996 Annual Recipes

signature

Related Posts with Thumbnails