Monday, June 10, 2013

Camembert and Berries

While we were stationed in Germany—many, many years ago—I was introduced to camembert cheese on toast with preiselberen (kind of like mini cranberries).  The presentation at our then favorite gasthaus, Berg Wirt, was this:  two pieces of white bread, toasted and cut on the diagonal, served alongside a breaded and baked mini wheel of camembert with a dollop of preiselbeeren.  It was delicious and I ordered it e-v-e-r-y- time we went there.

Since then, I have prepared and enjoyed camembert and brie in a variety of fashions.  Heck, there are few things I enjoy as much a slice of good brie on a fresh Triscuit (Velveeta on white bread, anyone?), but I recently tried a recipe recommended by a friend and am in love!  (Thanks Amy!)

(This is the recipe I referenced in this post about a creative evening with friends and family.)

Your ingredients:

2013-05-31 17.51.10

berries, I used blackberries, but this would work with just about any type of berry (2 cups)

agave nectar (2 T)

fresh rosemary (about 1 T, chopped—reserve some for garnish)

a small wheel of camembert (or brie)

a fresh baguette, sliced

butter

balsamic glaze*

2013-05-31 18.25.50

Mix the berries, agave nectar and rosemary together—allow juices to extract from the berries while you prepare the baguette slices.

Spread each side with butter, then brown on a griddle.

2013-05-31 18.30.54

Transfer baguette slices to a baking sheet, top with a slice of camembert and the berry mixture; place in oven set at 400°, until cheese is melting.  Transfer to serving platter, drizzle with balsamic glaze and serve!

2013-05-31 20.05.33

This is now one of my “go to” favorites! 

*for the balsamic glaze:  mix 2 cups of balsamic vinegar with 1 cup of brown sugar in a small sauce pan, heat to boiling.  Reduce heat to medium-low and simmer mixture until reduced by (about) half—mixture should be thick and syrupy.  (Refrigerate the remainder and use on other stuff—hamburgers, vegies, whathaveyou!)

Thanks for your indulgence,

signature

Saturday, June 8, 2013

Summertime grilling

Not being a big fan of hot weather, there are a few things I do enjoy about the summer—not the least of which is grilling most of our meals.  In actuality, we are year ‘round grillers, but we truly step-up the game during the summer months.
Everything from chicken legs and hotdogs to beef filets and prime rib have been prepared on our grill.  I would like to expand my repertoire with regard to main dishes, but the accompanying dishes, as well. 
I’ve prepared the more obvious side dishes on the grill—corn on the cob, potatoes and vegies—but there are some many more opportunities to use the grill. 
I started thinking about this while I was preparing one of my family’s favorite appetizers last week—mango brie quesadillas (thank you, Stacy)—and committed to myself that I would start investigating the aisles at our local book store for grilling books.  (Yup—that means I’ll be buying yet another cookbook, but a girls gotta do what a girls gotta do.  Don’t be a hater—it’s for my family for heaven’s sake.)
mango brie quesadillas
Truth is, as I typed that my mind went to Barefoot Contessa and Giada De Laurentiis cookbooks already in my collection.  They probably have a few recipes in there, but I am pretty sure Bobby Flay or another grilling expert would have it all neatly packed into one volume.  Again, this will require some exploration.
In the meantime, I wanted to share the recipe I came-up with the other night.  I had thawed some chicken breasts, but did not have a marinade planned.  Since I had the mango standing by for the quesadillas, I decided to use them in the marinade.  I actually buy mango in a jar—the kind packed in juice—because it is quick and easy to use for morning smoothies. 
Looking in the fridge and realizing we are heading out of town for a few days, I decided I needed to use the remnants of an open yogurt container.  A mango yogurt marinade started to formulate in my mind.  It’s loosely based on a recipe I got from my friend’s, Brooke’s, sister, Lynn. I usually use plain yogurt for marinades, but all we had was vanilla Greek yogurt—again, for smoothies.  Here’s how it played-out:
for six boneless, skinless chicken breasts
1 c. of yogurt
1/2 cup of mango juice (from jar)
1 T fresh lime juice
garlic (I had to use powdered because I was flat-out of fresh—if was okay, but it’ll never happen again.  I used about 1 t, but will use 2-3 minced cloves when I make it again.)
chopped cilantro, about 3 T
2 t curry powder
3 T olive oil
I allowed it to marinade for about 1 hour, but will allow more time the next time I make it.  I grilled over medium-low heat.  don’t ask me how long—as I rarely do it the same way twice.
mango chicken
Do you have any favorite grilling recipes? Will you share them with me, please.  I enjoy cookbook recipes, prepared by people in restaurant-worthy kitchens, but the best ones come from real people in their real kitchens.
Thanks for your indulgence.
signature

Friday, May 31, 2013

Blackberries and book folding

book fold all
I’ve been thinking about having some girlfriends over for dinner and a creative activity, but couldn’t manage to put the plans together.  On Tuesday, I had the thought that I really want to put together a window display in support of the Clarksville Writers Conference.
Quickly, the thoughts converged and I sent out a quick facebook message asking a few friends to join me to dinner and book folding.  As the request was last minute and people tend to make plans in advance, I was only able to entice a few to join me. 
So, thanks to Taylor, Kate, Kendall and Hunter for helping me create a substantial creative display for our windows at Hodgepodge.  If you’re in downtown Clarksville, I hope you stop by to see. 
If you want to learn more about the conference, visit their website here.

book fold 6book fold 5book fold 3book fold 4book fold 2book fold 1
I’ve written another blog about using vintage books in your decorating, as well as page/book folding; I am really drawn to the artistic qualities they offer.  I encourage you to try one on your own.
I recently found this blog with some great patterns and tutorials on the craft.  Click the picture for a link to the blog.
book folding image
Oh, I almost forgot the “blackberry” reference in the title of this blog . . .
Just in case you’re thinking, “Note to self—don’t accept an invitation to spend an evening of creativity with Paige.  She will work me like a dog just to get her windows decorated!”  Let me entice you with a photo of the platter of appetizers I offered . . .
blackberry
Sure, I overcooked the steak for the salads, but with this platter at the center of the table, I believe I was forgiven for the hard labor and burnt steak!  (A special thanks to Amy for sending me a link to the recipe—it arrived in my inbox yesterday morning!  The moment I saw it I knew I would be fixing it for my friends.  I will share the recipe later.)
One, very important thanks I neglected to mention earlier is for our son, Haedyn. He cleaned-up the dinner dishes and regaled us with his multitude of talents all the while we created book art.
Thanks for your indulgence!
signature

Wednesday, May 22, 2013

garden trellis

A few weeks ago I mentioned, in my column for The Leaf Chronicle, the fact that I had assembled a pyramid-shaped garden trellis using some inexpensive, pre-made trellises.

trellis pyramid

Here’s how you can make one, too.

You will need:

Three rose trellises

one 8” terra cotta pot

plastic tie straps

shovel

a good friend, flown in from Norway and her adorable daughter

vine seeds and water

2013-05-02 09.55.59

First, ask your friend to hold the first two trellises in position, while she is also attempting to explain to her 3 1/2 year old why she must wait to attach the plastic tie straps.

432

Quickly mark position for the points of contact  for each of the trellises in order to “plant” the ends in the ground.  This will give the structure additional stability when it “runs into” your 90 lb dog.

434


435

Once you are sure you’ve got the three pieces positioned correctly (check to ensure it relatively level—I used a brick to level this one), then pack the dirt around the points of contact.

438

You can then turn the three-year-old loose with the strip ties.

441442

I also used basic “L” shaped stakes to add a little more stability.

447446

Plant seeds and enlist the help of someone interested in topping-off your efforts with a little water.

449

Add an inverted flower pot to the peak of the pyramid.

453

I have a finial for the top, but wanted to make sure the contraption would withstand the typical elements of the area before I topped it.  (I think the storms tonight will give me the opportunity to find my answer.)

Let me know if you have any questions.

Thanks for your indulgence,

signature_thumb[3]

Sunday, May 5, 2013

the long awaited

If you’ve been a follower of my blog for any amount of time, you are well aware of the fact that I have been forever looking forward to the time when we could replace a few of our appliances and replace our laminate countertops.
I have been forever posting about my dream options and what I would do if/when I had the opportunity to make some changes.  If I mulled one option, I’ve mulled them all!
In case you are new to my blog or you’re grey matter is better occupied with items affecting your own life, allow me to mention a few details about our house.
Our house is slightly older than 130 years.  When we purchased it, the kitchen was a bright and cheery yellow with white cabinets and appliances.  It was lovely, but didn’t really suit my style.  Apparently, I am not “bright and cheery;” I am more dark and, (what?) depressing?  No, that’s not it (at least, I hope not).  Well, choose your own adjective, but be gentle, please.
First we painted (walls and cabinets), then we added ceiling tin for a backsplash, followed by a few other projects (details are here).  A new refrigerator happened.  A few years ago we added the new flooring. 
That was big.  We did it ourselves.  ‘nough said.
I have been struggling with the options available for our counter top choices.  The brief history:  I wanted marble (too expensive), same was true of the solid surface substitutes.  I loved the butcher block counter our friends, Glenn and Märtha had installed in their house, but they didn’t have a backsplash, which we needed due to the tin we had installed.
It took me far too long to come up with idea of using a piece of 1 x 6 and painting in black.  The idea hit me while flipping through an issue of This Old House magazine.  (I have spent two days looking for an image to show you, but I can’t find it.)  Once I had that all-to-obvious answer to my problem, the die was cast and we started planning. 
This spring, Darren let me know that he had set aside enough money so that we could purchase the remainder of our countertops and some appliances.
Okay—so, let’s cut to the chase.  The new stuff!
It started like this:
off came the counter tops and out with the dishwasher . . .
2013-05-01 09.01.57
we have a large, cast iron sink—that will be back . . .
2013-05-01 09.02.05
away with the white, only 3 working burners stove . . .
2013-05-01 09.02.13
Then there was this:
Larry on the right and his son, Ryan, on the left—taking measurements for the sink . . .
2013-05-02 09.54.05
Glenn doing his impression of supervisor.  He was actually a huge help throughout this process.
2013-05-02 09.54.18
My contribution . . . painting the boards for the backsplash.
2013-05-02 10.44.19
We had a bit of a scare when all of the counter tops were unwrapped and one piece was much lighter than the others.
2013-05-02 11.19.52
They were purchased on three separate occasions—two pieces were purchased within a few weeks of each other, but the third piece was purchased by Glenn and Märtha several years ago.
2013-05-03 17.34.46
As it turned out, two of the pieces had been pre-treated with the mineral oil recommended for the care of butcher block counters.  Once we added the mineral oil to the lighter piece it became quickly obvious it would take on the same patina as the others.
And, here they are!
2013-05-03 17.33.04
I had started to put all of my stuff back in its place, then thought I better get a picture of them naked.
2013-05-03 17.34.57
At risk of breaking my arm, patting myself on the back, I have to say they look as though they have always been here; exactly what I wanted.  I am happier than I thought I would be!
2013-05-03 17.35.03
Then I returned everything to its place.  (I will be replacing that microwave soon.)
2013-05-04 17.39.59
The new range and hood.  I am in love!
2013-05-04 17.41.48
You can see the new, extremely quiet and large dishwasher in the left corner.
2013-05-04 17.41.57
Here you see our wonderful sink back in place.  (I missed that dishcloth hanging in the cabinet—oh well, it is the most used room in the house and there is the evidence!)
2013-05-04 17.41.42

Not able to leave “well-enough alone,” I have already considered a possible mini-project.  The cabinet doors under the sink are not hanging square anymore.  I am thinking of removing them and hanging some curtains instead.  What’s your opinion?  I think it will look period appropriate.  Would you remove the faux drawers and start the curtain there or would you just remove the doors?  I suppose if I just remove the doors, they could be replaced later, if desired.  I’d use something resembling vintage flax—the real thing is acceptable, too, but I need easy care as dirty hands will be accessing them.  I am interested in your thoughts.
Okay—this has been an extremely long and self-indulgent post.  I hope it helps someone with their remodeling project.  I just want you to know that it was a very inexpensive (as kitchen renovations go) update—less than 6K which included my appliances, counter tops, and the construction costs.  I had a very reliable, conscientious and competent team doing the work (Elite Renovations).  If you have any questions about my choices or how things are working-out, let me know . . . I’ve been there and now . . . I’ve done that!
More than ever, I thank you for your indulgence.
signature

Friday, April 26, 2013

inspiration resources

ever felt like you are the only person on the face of the earth suffering from a severe lack of creativity? of inspiration? of motivation?

well, here I sit—wondering where my “c.i.m.” is, so I started perusing blog list and the answer is no.  no one else appears to be suffering from a lack of c.i.m.

did you know in australia, the 25th of april is anzac day?  my friend tanya posted a poignant tribute on her blog, suburban jubilee.

and then there is the amazing pam garrison who is working on this great commitment to document her “project life” (now into week 13), plus all kinds of other creativity she manages to squeeze in as well.  (it’s enough to make a girl feel like a total failure!)


then there is my friend, kimberly jones, who not only participated in one of jeanne oliver’s workshops, but she actually took what she learned and made this . . .

Lovely Day Painterly Collage Art Journal Cover via Serendipity Vintage Studio


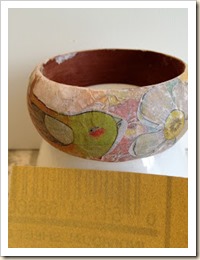
and finally, my upstairs neighbor, kimberly santiago—having veered off our mutually-agreed-to complacency path—took another stroll down the road of productivity and added these kits to her inspired inventory.

bangle 8

this is just a sampling of all of the productive and creative folks out there accomplishing great things.

so, tell me, how do you overcome your creative obstacles?

thanks for your indulgence.

signature

Related Posts with Thumbnails