Showing posts with label inspiration. Show all posts

Monday, February 9, 2015

Put Casters on It

This is a philosophy I developed for just about any piece of furniture I had at the shop—put casters on it.  That way, when the mood hit me to move things around—generally, just before closing time so Patty would walk into my typical chaos the next morning—I could move the large pieces of furniture by myself.

While I had become pretty adept at loading large pieces onto a four-wheel furniture dolly all-by-my-lonesome, the casters were much easier on the back.

Unfortunately, I didn’t come-up with this brilliant philosophy until I was just about ready to close.  I had thought of it for large pieces which, ironically, remained rather stationary—like my check-out desk.  But, especially on the pieces I had custom made, I started asking Jeff to put casters on those.  It made delivering those items easy and, should the clients desire, they could be easily removed.

So, when I went in search of a piece of furniture to fill a void in our newly renovated laundry room, I was surprised that it took me a while to figure out what to do. 

I had this space . . . and heaven forbid it just remain “space.”  So, the space was screaming for something to keep it company.  My first fix was this:

laundry after 2

You can see (just barely) the almost ideal table—it is an absolutely darling little metal table (on casters) which I had at the shop and just couldn’t let go.  It’s made its way around the house and I am determined to find the perfect location in this house (or another).

In the meantime, however, it didn’t work here.  It was way too long to allow us to open the refrigerator door.  And, though it is on casters, I didn’t want to scoot it out of the way every time we need something from the fridge.

Then, while out shopping with my mom, sister and daughter, I came across this:

2015-02-07 17.09.02


As you may have already inferred from the background—I brought it home.  It’s a large crate which had been divided into cubbies of varying size—which made it perfect for my junk of varying size.  (Did you notice that wonderful blue-green paint on the interior?)

As you may have also already inferred, it is too large for the space, too.  It is not as wide as the other piece, but it is close.  Yet this pieces had so much more to recommend itself for this space that I decided I must make it work.

So, I scooted it down as close to the door jam as I could and proceeded to load it with junk (those cubbies on the right are the perfect size for wine bottles).  The refrigerator door opened, but I couldn’t access the crisper drawer on the bottom, right-hand side.  Oh well—I could make do without it—this is, after all, our “bonus” fridge.

Then it occurred to me . . . put casters on it!  And that I did.

When you are adding casters, you need to make sure you get the correct size and construction for your needs.  This crate is fairly light weight, but with all of the stuff I planned to load into it, I need to consider the weight capacity.  I also decided on a rubber wheels, as opposed to plastic or metal, since it would be rolling around on our new, vinyl laminate flooring.

I emptied the crate and flipped it over to expose the bottom—picked off the mounds of dog hair which had already attached there—and began marking the holes for drilling. 

2015-02-07 17.13.10


(This is one thing I have to make myself do—pre-drilling.  It is much like prep work for painting—a necessary evil.)

2015-02-07 17.25.312015-02-07 17.32.57

And here we have the final product—all loaded down with junk for storage (those wine bottles I mentioned and a portion of my cookbook collection) and display.  (I’ve gotta learn to control that flash!)

2015-02-07 17.42.59

Bonus:  it is ready to roll out of the way to allow access to that all important crisper drawer!

2015-02-07 17.43.30

Are you a fan of casters?  Have you found a unique use for them or a place where you could not do without them? Do tell!

Thanks for your indulgence,

signature

Tuesday, January 28, 2014

Post Christmas Dinner

I promised the readers of my weekly column in The Leaf Chronicle a copy of our menu for Christmas Dinner (which wasn’t prepared until the following Saturday).  I love having the menus of tried-and-true meals, served by real people, for my own use, so perhaps you will find some appeal in this menu.  If you have offered the same thing on your blog (or elsewhere) I hope you let me know—I’d love to check-it-out.

The menu:

Rosemary Prime Rib

Brussels Sprouts

Bourbon Carrots

Barley Casserole

Almond-Citrus Salad

Rosemary Prime Rib

6 garlic cloves, pressed

2 tsp salt

2 tsp pepper

1 tsp crushed rosemary

2 tbsp olive oil

1 (7 lb) 4-rib prime rib roast, chine bone removed

1 c sour cream

2 tbsp lemon juice

2 tbsp prepared horseradish

Combine first 5 ingredients in a small bowl; rub over roast. Let roast stand at room temp for 30 mins.

Bake at 450 degrees for 45 mins on lower rack of oven.  Reduce temp to 350 degrees and bake 45 – 50 mins or until meat thermometer inserted into roast registers 145 degrees (medium rare) or 160 degrees 9medium).  let stand 20 minutes

Combine sour cream, lemon juice, and horseradish; serve with roast.

Southern Living 2003 annual recipes

(For the record, we prepared our roasts for 45 minutes in our oven, then moved them to the grill, which we had preheated to a medium heat.)

Brussel Sprouts with Bacon

4 slices bacon, chopped into one-inch pieces

1 lb baby Brussels sprouts, thawed

1/2 c heavy cream

1 tbsp cream

1/2 tsp salt

1/4 tsp pepper

Cook bacon in large skillet over medium heat, remove cooked bacon.

Cook sprouts in bacon drippings until they start to brown; add cream, salt and pepper.  Cover cook over medium-low heat for 15 minutes; add lemon juice.  Top with cooked bacon just before serving.

This is actually a conglomeration of a few recipes—not sure where it originated.

Bourbon Carrots

3 c water

1 1/2 lbs baby carrots

1 tbsp sugar

1/2 tsp salt

2 tbsp butter

3 tbsp brown sugar

2 tbsp bourbon

Bring water to boil, add carrots, sugar and salt.  Return to boil and cook 5 minutes or until tender.

Melt butter and brown sugar in a large skillet over medium-high heat.  Stir in  carrots and cook stirring occasionally, 2 –3 mins or until well coated.  Add bourbon and cook, stirring occasionally, 3 more mins.

Southern Living 2003 annual recipes

Barley Casserole

1c barley

1/4 c butter

2 medium onions, chopped

4 ozs. mixed specialty mushrooms, chopped

4 c chicken broth

Melt the butter in a sauce pan, add barley and cook—stirring frequently—until barley is browned.  add chopped onions and mushrooms to sauce pan; cook until tender.  Transfer to a casserole dish, stir in chicken broth.  Cover and bake at 350 degrees for 1 1/2 hours.

Charlene Saunders Thomas (my mom)

Almond-Citrus Salad

2/3 c vegetable oil

2 tsp grated grapefruit rind

1/2 c fresh grapefruit juice

1 envelope Italian salad dressing mix

1 grapefruit

2 oranges

1 avocado, peeled and sliced

3 c torn spinach

3 c torn leaf lettuce

3 c iceberg lettuce

1/2 c sliced celery

1/2 c chopped green bell pepper

1/4 c Sweet-and-Spicy Almonds

Combine oil, rind, juice and dressing mix in a jar; cover tightly, and shake vigorously.

Peel and section grapefruit and oranges, and place in a large bowl.  add avocado and next five ingredients.

Add dressing, tossing to coat.  Sprinkle with Sweet-and-Spicy Almonds.

serves 8

Sweet-and-Spicy Almonds

1 c sliced almonds

1 T butter, melted

1 1/2 t sugar

1/4 t ground cumin

1/4 t chili powder

1/8 t dried crushed red pepper

pinch salt

Combine almonds and butter, stirring well.  Combine sugar and remaining 4 ingredients; sprinkle over almonds, tossing to coat.  Spread on a lightly greased baking sheet.

Bake at 325 degrees  for15 minutes, stirring occasionally; cool.

(Make a double batch to use as an appetizer or hostess gift.)

Southern Living 1996 Annual Recipes

signature

Monday, September 30, 2013

Adopted southerness

Changing the windows to reflect the season has always been a daunting task for me.  You can check—I almost always open my posts about my windows with a similar comment.  You will note, however, that most of my blog posts about my windows will be about fall or Christmas displays.  You will also note, that with this particular season, my frequency of blog posts will increase.  Why is that?   Well, if you will pardon me as I allow a little bit of my adopted southerness to show . . .

I love me some fall, y’all.


So, here we go . . .

The tradition in this window is to display and indoor and outdoor scene.  I hung the vintage window screens right next to my windows to give the impression you are looking through the windows to the outside.  Patty thinks it’s time for a change and that I should take them down; I know she is right—the screens have been there for years now—but I’m just not ready.

rt window, outside


I picked-up that pasture gate early this past summer and it’s been part of a display in the shop, but when I was planning the windows, I decided it would be the best focal feature to make you think “outside” when you’re peeking in.  

rt window, outside wide

The swing is a new addition to the shop.  It is available in three sizes and well as a single-seater circle swing.

rt window outside, tall

Then there is our little campfire scene—the warm glow of the fire and the ingredients for s’mores are at the ready!  The growler of beer from The Blackhorse Pub and Brewery will be enjoyed, as well.

rt window outside, s'mores

The we shifted our attention to the inside scene of the same window.  This was a quick change of a few items.  Having removed the dining room display we had for the summer months, I added a side table and vintage, cane-back rocker.  A few of our signature Haunted Memories changing photos, fake cobwebbing and we’re good.

rt window, inside tightrt window inside

Look closely for the before and after of Aunt Maggie below.

window maggiemaggie after

Now we’re transitioning to the other window where we have a bed and a few other vignettes surrounding it.

left window, wide


The French café scene came to me when I decided to move the hand painted Café de Flore door into the front corner—not an easy feat for this old lady, but I managed it, then kept the scene simple with a dress form and a market basket.  the table in the display is an authentic English pub table (yes—I realize I’m mixing my countries of influence), that extends to seat 6.

window french table

We’ve dressed the bed in a red matelesse –style quilt; added a mix of pillows and a vintage camp-style blanket for the fall bedroom scene I wanted to achieve.  The floral displays in our gorgeous pottery urns would transition very nicely to compliment your winter décor, as well.  You also see the lovely limited edition print from the talented Judy Lewis of my favorite building in Clarksville; already framed and ready to hang in your house.

window daybed


Well, that about wraps-up the tour of our windows.  There are a few other details I haven’t touched on, but I need to give you something to see when you get here.

Thanks for your indulgence.

signature

Tuesday, September 17, 2013

A Plush Fall

I love transitioning into fall.  Even if the weather isn’t cooperating fully—just seeing mums and pumpkins in front of Kroger makes me happy!

I am always so excited to decorate my home and the shop for fall, although, I believe that I tend to decorate with a fall theme year ‘round.  It incorporates the colors and accents I love, so why wouldn’t I use them all of the time?

At the house, I’m holding back a little.  I’ve put away the “summer” banner, the cobalt hurricanes and the shell encrusted orbs.  The candles are changing from ivory to brown and the candle sticks from glass to well- patinaed (apparently you can’t shouldn’t past-tense “patina”) brass.  

But  at the shop we have added the Halloween inventory and a plethora of pumpkins—plush and otherwise!  There are oat standards and a variety of other decorative accents you can use to make changes of your own.  I have taken a few pictures and hope you will come back to check-out our ideas.  For now, though, I thought I’d share some of our Plush Pumpkins.

plush fall 2013

Folks often ask how they should display their Plush Pumpkins, so I thought a few pictures might help.

plush fall 2013 2

You don’t have to have a baker’s dozen for your display.

plush fall 2013 3

A grouping of three pumpkins is my favorite display, but if you only want one—they can make a solitary statement, as well (note the pumpkin atop the scale).  Also, just because they’re velvet, doesn’t mean they can’t be displayed with your favorite rusty junk.  In fact, the juxtaposition makes a wonderful eye-catching display.

plush fall 2013 5

Of course, they are right at home surrounded by glitz and gold, as well.

plush fall 2013 4

So, don’t let the issue of “how will I display mine” keep you from taking a few home.  Remember, we are always available to help you brainstorm a few ideas for your own arrangement.

Hope to see you in our Plush Pumpkin patch soon!

Thanks for your indulgence,

signature

Sunday, May 5, 2013

the long awaited

If you’ve been a follower of my blog for any amount of time, you are well aware of the fact that I have been forever looking forward to the time when we could replace a few of our appliances and replace our laminate countertops.
I have been forever posting about my dream options and what I would do if/when I had the opportunity to make some changes.  If I mulled one option, I’ve mulled them all!
In case you are new to my blog or you’re grey matter is better occupied with items affecting your own life, allow me to mention a few details about our house.
Our house is slightly older than 130 years.  When we purchased it, the kitchen was a bright and cheery yellow with white cabinets and appliances.  It was lovely, but didn’t really suit my style.  Apparently, I am not “bright and cheery;” I am more dark and, (what?) depressing?  No, that’s not it (at least, I hope not).  Well, choose your own adjective, but be gentle, please.
First we painted (walls and cabinets), then we added ceiling tin for a backsplash, followed by a few other projects (details are here).  A new refrigerator happened.  A few years ago we added the new flooring. 
That was big.  We did it ourselves.  ‘nough said.
I have been struggling with the options available for our counter top choices.  The brief history:  I wanted marble (too expensive), same was true of the solid surface substitutes.  I loved the butcher block counter our friends, Glenn and Märtha had installed in their house, but they didn’t have a backsplash, which we needed due to the tin we had installed.
It took me far too long to come up with idea of using a piece of 1 x 6 and painting in black.  The idea hit me while flipping through an issue of This Old House magazine.  (I have spent two days looking for an image to show you, but I can’t find it.)  Once I had that all-to-obvious answer to my problem, the die was cast and we started planning. 
This spring, Darren let me know that he had set aside enough money so that we could purchase the remainder of our countertops and some appliances.
Okay—so, let’s cut to the chase.  The new stuff!
It started like this:
off came the counter tops and out with the dishwasher . . .
2013-05-01 09.01.57
we have a large, cast iron sink—that will be back . . .
2013-05-01 09.02.05
away with the white, only 3 working burners stove . . .
2013-05-01 09.02.13
Then there was this:
Larry on the right and his son, Ryan, on the left—taking measurements for the sink . . .
2013-05-02 09.54.05
Glenn doing his impression of supervisor.  He was actually a huge help throughout this process.
2013-05-02 09.54.18
My contribution . . . painting the boards for the backsplash.
2013-05-02 10.44.19
We had a bit of a scare when all of the counter tops were unwrapped and one piece was much lighter than the others.
2013-05-02 11.19.52
They were purchased on three separate occasions—two pieces were purchased within a few weeks of each other, but the third piece was purchased by Glenn and Märtha several years ago.
2013-05-03 17.34.46
As it turned out, two of the pieces had been pre-treated with the mineral oil recommended for the care of butcher block counters.  Once we added the mineral oil to the lighter piece it became quickly obvious it would take on the same patina as the others.
And, here they are!
2013-05-03 17.33.04
I had started to put all of my stuff back in its place, then thought I better get a picture of them naked.
2013-05-03 17.34.57
At risk of breaking my arm, patting myself on the back, I have to say they look as though they have always been here; exactly what I wanted.  I am happier than I thought I would be!
2013-05-03 17.35.03
Then I returned everything to its place.  (I will be replacing that microwave soon.)
2013-05-04 17.39.59
The new range and hood.  I am in love!
2013-05-04 17.41.48
You can see the new, extremely quiet and large dishwasher in the left corner.
2013-05-04 17.41.57
Here you see our wonderful sink back in place.  (I missed that dishcloth hanging in the cabinet—oh well, it is the most used room in the house and there is the evidence!)
2013-05-04 17.41.42

Not able to leave “well-enough alone,” I have already considered a possible mini-project.  The cabinet doors under the sink are not hanging square anymore.  I am thinking of removing them and hanging some curtains instead.  What’s your opinion?  I think it will look period appropriate.  Would you remove the faux drawers and start the curtain there or would you just remove the doors?  I suppose if I just remove the doors, they could be replaced later, if desired.  I’d use something resembling vintage flax—the real thing is acceptable, too, but I need easy care as dirty hands will be accessing them.  I am interested in your thoughts.
Okay—this has been an extremely long and self-indulgent post.  I hope it helps someone with their remodeling project.  I just want you to know that it was a very inexpensive (as kitchen renovations go) update—less than 6K which included my appliances, counter tops, and the construction costs.  I had a very reliable, conscientious and competent team doing the work (Elite Renovations).  If you have any questions about my choices or how things are working-out, let me know . . . I’ve been there and now . . . I’ve done that!
More than ever, I thank you for your indulgence.
signature

Friday, April 26, 2013

inspiration resources

ever felt like you are the only person on the face of the earth suffering from a severe lack of creativity? of inspiration? of motivation?

well, here I sit—wondering where my “c.i.m.” is, so I started perusing blog list and the answer is no.  no one else appears to be suffering from a lack of c.i.m.

did you know in australia, the 25th of april is anzac day?  my friend tanya posted a poignant tribute on her blog, suburban jubilee.

and then there is the amazing pam garrison who is working on this great commitment to document her “project life” (now into week 13), plus all kinds of other creativity she manages to squeeze in as well.  (it’s enough to make a girl feel like a total failure!)


then there is my friend, kimberly jones, who not only participated in one of jeanne oliver’s workshops, but she actually took what she learned and made this . . .

Lovely Day Painterly Collage Art Journal Cover via Serendipity Vintage Studio


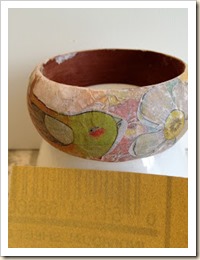
and finally, my upstairs neighbor, kimberly santiago—having veered off our mutually-agreed-to complacency path—took another stroll down the road of productivity and added these kits to her inspired inventory.

bangle 8

this is just a sampling of all of the productive and creative folks out there accomplishing great things.

so, tell me, how do you overcome your creative obstacles?

thanks for your indulgence.

signature

Tuesday, April 16, 2013

changes are afoot

there are few things that get me as jazzed about being a shopkeeper as doing a BIG switch-a-roo at the shop.  we have new things rolling into the shop, so my creative juices have been flowing.   it takes  a while to build-up to making such a big change, but once i decide the major pivot points—so to speak—we start the shuffling.  we move the small pieces off of the display furniture, reposition the furniture and start putting it all together again. 

we work the new merchandise into the displays and show new ways to use and display the items we have had for a while.  what better way to show folks that we offer home décor that they will use year ‘round?  i mean, when you decorate for the various seasons you choose to celebrate, you don’t move all of your existing furniture and accessories out of the house—you make additions (along with a few subtractions).

I hope, if you live nearby, you will come in for a “look-see” yourself, but here are a few pictures to show you a few of our changes.


table one

table one 2

table two

wall right

wall center

wall entire

new display

angel table

front table

front wall

sideboard

bed bench

middle table

coffee table

cupboard

cupboard wall

bunny

tiered table

blue light

black cupboard

I will be posting some detail shots of the inventory and displays later this week, but as I said—I hope you plan to come for a visit soon.

thanks for your indulgence,

signature

Related Posts with Thumbnails